Frequently Asked Questions
Jump to section
General queries
Fire and fire.com are trading names for Fire Financial Services Limited. Fire Financial Services (fire-EU) is regulated by the Central Bank of Ireland as a Payment Institution and as such it is authorised to provide specific payments accounts and services. Fire Financial Services (fire-UK) is authorised as an Electronic Money Institution by the Financial Conduct Authority. We are not a bank and we do not provide credit (loans) or overdrafts. Nor do we pay any interest on funds that may be held in a Fire account.
All client funds (i.e. your money) are held in separate, ring fenced accounts in tier one financial institutions. Client funds are never mixed with our own funds, never invested nor used for any operational purpose. No liquidator, receiver, administrator, examiner or creditor of a Payment Institution or Electronic Money Institution, nor the official assignee in bankruptcy has any recourse or right against client funds held in accordance with the above.
As the fire-EU payments licence is an EU based regulation, Fire has passported its licence to other European countries to offer our services across Europe.
Learn more about Fire, our founder and the Fire management team.
If you have any other questions, comments or feedback we would be delighted to hear from you at any time. Reach out to us at support@fire.com.
As an Electronic Money Institution in the UK and a Payment Institution in Ireland, we are required to “safeguard” customer funds.
We place your money in a designated safeguarding account with a regulated financial institution. This account holds only Fire customers’ funds and Fire ensures this money is never used for operational or lending purposes.
In the unlikely event that Fire ceases trading, the safeguarding account is protected from other creditors making a claim against Fire. In this scenario, you would get the majority of your money back, except for costs deducted by the insolvency practitioner for distributing the money to you. This will only be deducted from customer balances if there are no funds available from Fire itself.
As the account you hold with us is not a bank account, your money is not covered by the Financial Services Compensation Scheme in the UK/Deposit Guarantee Scheme in Ireland.
You can read more here:
Protecting your personal data is very important to us. We take appropriate measures to ensure confidentiality of all personal data, both paper and electronic, required for the operation of our business. We take appropriate steps to protect data stored or transmitted against accidental or unlawful destruction, accidental loss or alteration, and unauthorised or unlawful storage, processing, access or disclosure.
We are committed to and comply with all relevant Data Protection and Privacy legislation and/or regulations of the jurisdictions within which we operate. We will ensure that your personal data can be used only by authorised personnel for legally authorised purposes. We will only use personal data in our possession for its intended specific and authorised purpose.
Your personal data may be transferred to contracted third parties, e.g. banks and other firms external to us for the purposes of providing our services to you. In these circumstances Fire will oblige contracted third parties to ensure that your personal data is securely managed and protected at all times. These third parties will only process and use your personal data in line with fire.com specific instructions.
We or our contracted third parties may share your personal information with authorities within Ireland, the United Kingdom and abroad to prevent money laundering, terrorism and fraud in order to meet legal obligations.
Your personal data will be retained and maintained in accordance with applicable Data Protection and Privacy laws and regulations which oblige Fire to hold its customer data for up to six years after the last transaction or end of business relationship whichever comes first.
Lodgements and withdrawals to and from external banks are subject to the standard bank transfer timelines.
Typically Fire receive the transfer from external banks within one working day, as long as the request was processed by the bank before 4:30pm. If the transfer was carried out near or after 4.30pm, the transfer could take two days in some cases. No transfers are received, or therefore applied, at weekends, or outside business hours.
Fire does not support crypto currency related activity. If a crypto currency related payment is made to a Fire account, the funds will be returned to the sender.
Two-factor Authentication (2FA) is an extra level of verification required for certain activities on the Fire Business Account. Think of it as a second way to verify yourself.
For Fire Business customers, any time Fire ask for “Your Authentication Code / 2FA code”, this code will always be available in the same location – the ‘Security’ tab of the “firework for mobile” app (see below).

Simply input this six digit code into “Your Authentication Code / 2FA” field and verification will be confirmed.
Confirmation of Payee (CoP) is a UK-based name checking service for Faster Payments, CHAPS and standing orders. It checks that the name on the destination account matches the name entered by the payer or sender. The scheme aims to reduce fraud and sending payments to the wrong account by accident.
For further information on how Confirmation of Payee works and what name should be used for Confirmation of Payee, please refer to our Business FAQs.
Verification of Payee is an account name checking service designed to help reduce misdirected payments, and provides greater assurance that payments are being sent to the intended account holder for SEPA payments. This includes all payments to and from Fire euro accounts.
For further information on how Verification of Payee works and what name should be used for Verification of Payee, please refer to our Business FAQs.
Photo ID
Photo ID must:
- Display your name
- Display a clear photo
- The document must be in colour (photo itself can be black and white)
- Display your date of birth
- Be active and in date (not expired)
Examples of a valid Photo ID
- Passport
- Driver’s Licence
- National ID Card

Address Verification
An address verification document must:
- Be dated within the last 6 months
- Be addressed to you
- Not be a National ID card or Driving Licence
Examples of a valid Address Verification document
- Fixed Utility Bill
- Bank Statement,
- Government Issued Document

Reporting fraudulent activity
You should contact Fire straight away at support@fire.com if you have any concerns or suspicions of fraudulent activity, or of your accounts being in any way compromised.
You can also take the following actions to protect yourself proactively if you suspect someone has managed to access your Fire account or debit card:
-
If your mobile device is lost or stolen, or you think your login details have been compromised in any way, you should unlink your device and change your login credentials immediately.
-
If your debit card is lost or stolen, you should block the card immediately from the mobile or web app, and contact support@fire.com to order a replacement.
-
If you have an API application and if you ever accidentally reveal the Client Key, or accidentally commit it to Github for instance, it is vital that you log into the web app and delete/recreate the App Tokens as soon as possible.
Protecting yourself against fraud
It is important to be vigilant and follow some best practices to avoid becoming a victim of fraud or scams. For example:
-
Never share your login details including password, access code. Fire will never ask you to share these details.
-
Verify contact details and any URLs contained in messages before taking any action requested by a third party over email, phone or otherwise.
-
Avoid sending money to someone you have only met online, or do not fully trust.
-
When making online purchases, ensure the website starts with https:// – not just http.
-
Ensure regular virus checks and firewall protection are carried out on your computer(s) and device(s).
You can find even more information from the below resources:
https://www.citizensinformation.ie/en/consumer/buying-digital-content-and-services/scams-and-fraud
https://www.gov.uk/report-suspicious-emails-websites-phishing
-
Business customers
Fire offers digital payment services to help businesses streamline their payments, either through our web app or the Fire Payments API.
We onboard businesses incorporated in the United Kingdom or Ireland with directors/owners resident and/or citizens of the EU & UK (and other countries available on request). We may accept applications from sole traders based in the United Kingdom or Ireland.
Fire is not a bank, and we do not facilitate cash deposits, cheques, pay interest on funds held with us, nor do we offer loans or credit facilities.
If you want to integrate your payments and are interested in becoming a Fire customer, fill out this simple form and our sales team will be in touch.
If you have any questions about Fire being the right fit, get in touch with the team at sales@fire.com who will be happy to help.
We require documentation during the onboarding process to verify your business activity. It is suggested that three of the below are provided where possible. If you are trading in a regulated industry or you are required to be licensed please see our ‘I am trading in a regulated industry, what do I need to provide?’ FAQ.
-
A recent invoice, preferably issued in the last 6 months, and a Financial Statement showing the invoice as paid. This can be an invoice issued from your business or by a supplier.
-
A valid contract. This will need to be signed and in date.
-
A live website and proof of domain ownership (this can be the email address linked to the domain or an invoice from the domain provider)
-
An official lease.
-
An insurance policy.
-
Proof of trademark.
-
If you are trading in a regulated or licenced industry you will need to provide proof of the following.
-
Proof of Regulation – If you are trading in a regulated industry you will need to provide proof of this, such as FCA or CBI regulation.
-
Proof of licence/qualification – If you are trading in an industry that required relevant licence or qualification, you will need to provide proof of this, such as Medicine, Law or as an Electrician.
-
An Administrator has full account access and user management access (add users and edit user roles).
A Full User also has full account access, but does not have user management access.
A Read Only User has access to review the account data.
A Card Only User can use their assigned card to create transactions and review transactions associated with their assigned card only.
A Payment Only User can process payments to existing payees but cannot set up new payees. They can also create Fire Open Payment requests.
A Payee Management User has access to review account data as well as the ability to create new payees. They cannot make payments to new or existing payees.
Supported currencies for local payouts
.
In addition to euro and sterling bank transfers, you can send international payments in the below currencies. Please note that payments in these currencies must be made to an account held with a bank in the corresponding country.
-
Australia – Australian Dollar
-
Canada – Canadian Dollar
-
Czechia – Czech Koruna
-
Denmark – Danish Krone
-
Hong Kong – Hong Kong Dollar
-
Hungary – Hungarian Forint
-
Norway – Norwegian Krone
-
Poland – Polish Zloty
-
Romania – Romanian Leu
-
Singapore – Singapore Dollar
-
Sweden – Swedish Krona
-
United States – US Dollar
Supported currencies for SWIFT Collections
.
Fire supports SWIFT collections received directly into your default account in 31 currencies:
-
Australian Dollar
-
Bahrain Dollar
-
Canadian Dollar
-
Chinese Yuan
-
Czech Koruna
-
Danish Krone
-
Euro
-
Hong Kong Dollar
-
Hungarian Forint
-
Israeli Shekel
-
Japanese Yen
-
Kenyan Shilling
-
Kuwait Dollar
-
Mexican Peso
-
New Zealand Dollar
-
Norwegian Krone
-
Omani Rial
-
Polish Zloty
-
Qatar Rial
-
Romanian Leu
-
Saudi Riyal
-
Singapore Dollar
-
South African Rand
-
Swedish Krona
-
Swiss Franc
-
Thai Baht
-
Turkish Lira
-
Ugandan Shilling
-
UK Sterling
-
United Arab Emirates Dirham
-
US Dollar
.
For more information on Fire’s international payments and FX services, see here.
-
The information required when setting up an International Payee will vary from currency to currency. When requesting payee details from the person or business you wish to pay, please ensure that they provide you with their local account details and not international details. Please note for the majority of international currencies you will require the payees address.
Currency Required Payee Details Australia – Australian Dollar - Payee Name: Full name of the person or business you are paying.
- Payee Address: Full address of the person or business you are paying including the city, county, country and postcode.
- BSB Code: Bank State Branch (BSB) code, a unique identifier for Australian banks
- Account Number: The recipient’s bank account number.
Canada – Canadian Dollar - Payee Name: Full name of the person or business you are paying.
- Payee Address: Full address of the person or business you are paying including the city, country and postcode.
- Bank Code: The bank code or institution number identifying the recipient’s bank.
- Branch Code: The branch code specifying the specific bank branch.
- Account Number: The recipient’s bank account number.
Czechia – Czech Koruna - Payee Name: Full name of the person or business you are paying.
- Payee Address: Full address of the person or business you are paying including the city and country.
- IBAN: International Bank Account Number, used for identifying bank accounts in some countries.
Denmark – Danish Krone - Payee Name: Full name of the person or business you are paying.
- Account Number: The recipient’s bank account number.
- Bank Code: The code identifying the recipient’s bank.
Hong Kong – Hong Kong Dollar - Payee Name: Full name of the person or business you are paying.
- Payee Address: The address of the payee’s residence or business.
- Payee City: The city where the payee is located.
- Payee Country: The country where the payee resides or operates.
- BIC: Bank Identifier Code, a unique identification code for the payee’s bank.
- Account Number: The recipient’s bank account number.
- Bank Code: The code identifying the recipient’s bank.
Hungary – Hungarian Forint - Payee Name: Full name of the person or business you are paying.
- Payee Address: The address of the payee’s residence or business.
- Payee City: The city where the payee is located.
- Payee Country: The country where the payee resides or operates.
- IBAN: International Bank Account Number, used for identifying bank accounts in some countries.
Norway – Norwegian Krone - Payee Name: Full name of the person or business you are paying.
- Payee Address: The address of the payee’s residence or business.
- Payee City: The city where the payee is located.
- Payee Country: The country where the payee resides or operates.
- Account Number: The recipient’s bank account number.
- Bank Code: The code identifying the recipient’s bank.
Poland – Polish Zloty - Payee Name: Full name of the person or business you are paying.
- Payee Address: The address of the payee’s residence or business.
- Payee City: The city where the payee is located.
- Payee Country: The country where the payee resides or operates.
- BIC: Bank Identifier Code, a unique identification code for the payee’s bank.
- IBAN: International Bank Account Number, used for identifying bank accounts in some countries.
Romania – Romanian Leu - Payee Name: Full name of the person or business you are paying.
- Payee Address: The address of the payee’s residence or business.
- Payee City: The city where the payee is located.
- Payee Country: The country where the payee resides or operates.
- IBAN: International Bank Account Number, used for identifying bank accounts in some countries.
Singapore – Singapore Dollar - Payee Name: Full name of the person or business you are paying.
- Payee Address: The address of the payee’s residence or business.
- Payee City: The city where the payee is located.
- Payee Country: The country where the payee resides or operates.
- BIC: Bank Identifier Code, a unique identification code for the payee’s bank.
- Account Number: The recipient’s bank account number.
Sweden – Swedish Krona - Payee Name: Full name of the person or business you are paying.
- Payee Address: The address of the payee’s residence or business.
- Payee City: The city where the payee is located.
- Payee Country: The country where the payee resides or operates.
- Bank Code: The code identifying the recipient’s bank.
- Account Number: The recipient’s bank account number.
United States – US Dollar - Payee Name: Full name of the person or business you are paying.
- Payee Address: The address of the payee’s residence or business.
- Payee City: The city where the payee is located.
- Payee Country: The country where the payee resides or operates.
- Payee Postcode: The postal code associated with the payee’s address.
- ABA Code: American Bankers Association routing number, used to identify US banks.
- Account Number: The recipient’s bank account number.
To add a payee, follow the instructions set out in the Payee user guide.
A Direct Debit mandate is a convenient way to make regular payments from your account, such as insurance payments or a monthly utility bill.
To set up a Direct Debit from your Fire Business Account, you will need to provide the biller with either the NSC and Account Number of your chosen Sterling account, or the IBAN of your chosen Euro account, and sign a mandate giving them permission to take the funds from your account on an agreed date. The funds will automatically be deducted from your account on the specified date.
You will receive advance notifications from the mobile app reminding you of any Direct Debit payments due from your account, showing you the date and amount to be paid, so you can ensure there are sufficient funds in the account ahead of time. The notifications are enabled as default, but can be disabled in the app settings if you wish.
You can also view the details of any Direct Debit Mandates set up on your account in the Direct Debits section of the app.
If you feel that you should not be paying a Direct Debit, you can cancel the mandate from the Actions menu. It is important that you also make the biller aware so they can resolve the issue.
You can find the details of an account either from the web app or mobile app. In either app, go to the Accounts screen and select the account. The IBAN and BIC for euro accounts, or Sort Code and Account number for sterling accounts will be displayed here.
If you have already filled out the Authorised User section of the Business Account Application and verified your email address and mobile number, you can easily reset the password from the application log in page.
If you have not reached this stage of your application, but you have forgotten your password, then please contact support@fire.com.
If you forget your Fire Business ID, you can find a reminder in the email we sent confirming your account is live, with the subject line Fire for Business – Activated.
Your Fire Business ID is an important credential used to login to the Fire for Business web app. It is for your use only and is not visible to customers.
Letters, numbers and dots are accepted characters when setting your Fire Business ID.
Under The Regulatory Technical Standards on Strong Customer Authentication and Common and Secure Open Standards of Communication, Strong Customer Authentication (SCA) must be used when accessing payment accounts online.
This is why we require account activity such as logging in or adding a new payee to be approved using the Fire for business mobile application. Linking your mobile device allows us to send you a push notification so you can authenticate and approve such account activity.
Transfer to a Fire account
Fire Open Payments : You can use Fire Open Payments to initiate a payment to your chosen Fire account. Present this to your payee as a QR code or link which they can follow to complete a bank transfer to you from their chosen account provider.
Bank Transfer: A Fire Sterling account (GBP) has a sort code & account number and a Euro account (EUR) has an IBAN associated with it. Anyone (e.g. a customer) who wishes to pay you by bank transfer may use these account numbers to transfer funds from any bank account in the UK or Eurozone. A bank transfer usually takes between a few hours and a day to reach its destination.
Sterling bank transfers are processed via Faster Payments and BACS, while Euro bank transfers are sent via the SEPA Credit Transfer (SCT) scheme.
Swift Transfer: You can receive a Swift transfer directly to your default account if you have requested international account details for your default account. Follow the instructions in this how to guide to get SWIFT-addressable account details.
Transfer from a Fire account
Bank Transfer: To transfer funds out of your Fire account (e.g. paying staff or suppliers) via a bank transfer, you must first create a payee in the Payees section of the Payments tab section of the Fire web app and enter their bank account details. You then select the Bank Transfer or International Transfer option from the relevant account in the Fire Accounts tab to execute the transfer.
Direct Debits: To set up a Direct Debit from your Fire Business Account, you will need to provide the biller with either the NSC and Account Number of your chosen Sterling account, or the IBAN of your chosen Euro account, and sign a mandate giving them permission to take the funds from your account on an agreed date. The funds will automatically be deducted from your account on the specified date.
Internal Transfers
Internal transfers between same currency Fire accounts are completed instantly. Internal transfers/FX transfers to another currency account (e.g. transferring from a Fire euro account to a Fire sterling account) are also instant.
Your default account is based on your business’s country of incorporation.
If your business is incorporated in Ireland, your default account is your Euro Account.
If your business is incorporated in The United Kingdom, your default account is your Sterling Account.
If you have multiple accounts in that currency, your default account is the first one that was opened
You can create Fire Open Payment Requests in both EUR and GBP. The currency is determined by the account you choose to be paid into.
Should you misplace a Fire debit card, you can block the card from either the mobile or web app. It is important that you block any cards that you believe to be lost or stolen. You can then contact support@fire.com to cancel the lost or stolen debit card and order a replacement.
Should lose your phone, you can unlink your device from your business account by signing in and clicking “link a different device to your account”.

If at any time you have concerns about your account or card being compromised, you should contact support@fire.com immediately to let us know.
You can reset your password from the web app login page. You can find a detailed step-by-step guide here.
To reset your access code, follow this step-by-step guide.
If you have forgotten both your password and access code, you will need to contact support@fire.com and our support team will send you an email to reset both.
We understand that a time of loss can be very difficult.
Whether you need to close the business account on behalf of a deceased account holder or transfer the role to someone else within the business, our team is here to help you each step of the way.Contact support@fire.com to notify us of the death and we will guide you through the next steps.
The monthly service fee is a €10 or £10 service fee, depending on the country in which your business is incorporated/located, that is deducted from your default account*.
No action is required from you to pay the fee. As long as the balance in your default account* is sufficient, you do not need to take any action.
Your account will not go into negative balance to pay the fee. If there are insufficient funds in your default account, Fire will not collect the service fee until the following month.
You do not need to take any action if you have an uncollected service fee. It will simply be collected along with next months’ fee. If the service fee for your business goes uncollected for an extended period, Fire’s support team will contact you.
*If you have multiple accounts in the same currency, the default account is the first account that was opened.
Dual Authorisation is a feature of the Fire Payments API that allows you to require multiple users to authorise API payments, depending on the level of control required by your business.
The number of authorisations required is set when creating the API application. The authorisers will receive push notifications to authorise the payment in the mobile app. API payment requests without authorisation from the required number of users will be rejected and discarded.
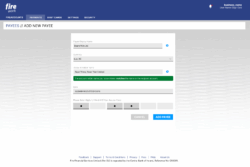
Adding a new payee
When adding a new payee, Fire, as your Payment Service Provider (PSP), can check the account name, sort code, and account number match with the records held by the receiving PSP to determine their accuracy.
With a Confirmation of Payee check, there are four possible outcomes:
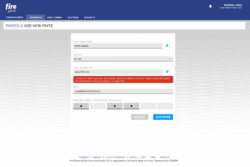
- Full match: If the details match, you will be able to continue adding the payee without issue.
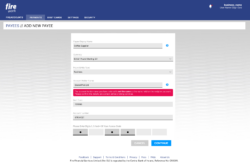
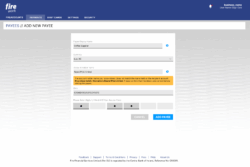
- Close match: If the name is similar, you’ll be shown the actual account holder’s name to review. You can update and try again or double-check with the recipient.
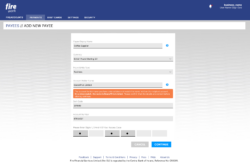
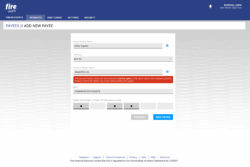
- No match, the name is wrong: If the name doesn’t match, you’ll be advised to contact the person or organisation you’re trying to pay.
- Unavailable: This means a check couldn’t be completed, for example due to timeout, customer opt-out, or if the account doesn’t exist.
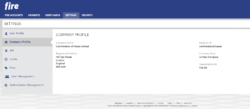
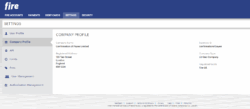
To pay a business account, the sender will need the business name registered to your account. You can confirm the exact name registered in the Company Profile section of your account.
Adding a Payee
When adding a new payee, Fire, as your Payment Service Provider (PSP), can check the account name, BIC, and IBAN match with the records held by the receiving PSP to determine their accuracy.
With a Verification of Payee check, there are four possible outcomes:
-
Full match: If the details match, you will be able to continue adding the payee without issue.
-
Partial match: If the name is similar, you’ll be shown the actual account holder’s name to review. You can update and try again or double-check with the recipient.
-
No match, the name is wrong: If the name doesn’t match, you’ll be advised to contact the person or organisation you’re trying to pay.
-
Unavailable: This means a check couldn’t be completed, for example due to timeout, customer opt-out, or if the account doesn’t exist.
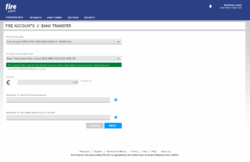
Sending a payment
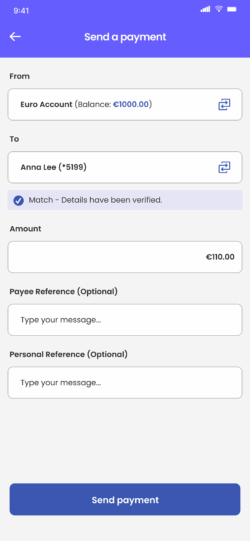
Verification of Payee differs from Confirmation of Payee because it occurs when you instruct a payment, not just when adding a payee. When you initiate a payment through our web portal, you will see a Verification of Payee response before submitting the payment.
There are four possible results, outlined below. If we checked the payee details within the past seven days, we will return the most recent result. If it has been more than seven days since the last check, we will conduct a fresh verification to confirm the name’s accuracy. You can recheck the details anytime by clicking the “Click here to recheck” link under the response bar.
-
Full match: If the details match, you will be able to continue adding the payee without issue.
-
Partial match: If the name is similar, you’ll be shown the actual account holder’s name to review.
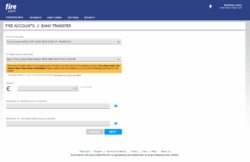
-
No match, the name is wrong: If the name doesn’t match, you’ll be advised to contact the person or organisation you’re trying to pay.
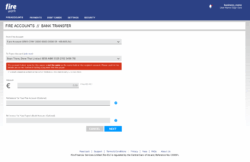
-
Unavailable: This means a check couldn’t be completed, for example due to timeout, customer opt-out, or if the account doesn’t exist.

-
-
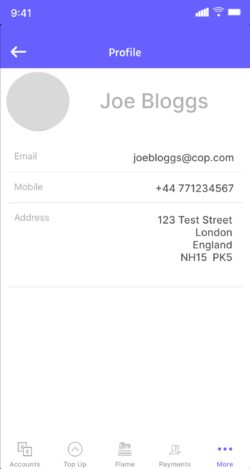
To pay a personal account, the sender will need the exact name used when you registered your account as well as your sort code and account number when adding you as a payee on their account.
-
To pay a business account, the sender will need the business name registered to your account. You can confirm the exact name registered in the Company Profile section of your account.
-
Yes, it is possible to receive international payments via SWIFT from more than 180 countries and territories, alongside local transfers through SEPA and Faster Payments.
Share your SWIFT-addressable account details to receive cross-border payments directly into your default euro or sterling account. Your default account is based on your country of incorporation.
You will need to provide the sender with your SWIFT-addressable account details, please note that these are different to your local account details. Follow the instructions in this how to guide to get SWIFT-addressable account details.
To receive international payments via SWIFT, you will need to provide the sender with your SWIFT-addressable account details. Please note that these are different to your normal Fire account details.
To get SWIFT-addressable account details you will need to follow these steps:
Web portal
1. Log in to your business account on the web portal.
2. In the account overview screen for your default account, click on the “Add International Account Details” link below your local account details.

3. Your account details will be available within a couple of seconds. Until then, you will see a pending message. You will receive a push notification to your mobile when the details are available.

4. Refresh to the account screen and you will see your SWIFT-addressable account details.

Personal customers
A Fire personal account is a digital account. It is used primarily to execute bank transfers, debit card purchases and payments to/from your contacts.
From September 2024 Fire is not accepting applications from new personal customers. This is for a period of 18-24 months.
Existing customers are not affected by this change as we continue to provide a full service to our current personal customers.
As a full user you may order your debit card at any time from the flame section of the app or the main menu. Your card will usually arrive in five business days. Fire debit cards may be used anywhere you see the MasterCard® logo – in store, online, for recurring bills and at ATMs for cash withdrawals. When your card arrives, you must activate the card by following the instructions in the app and letter.
Your Fire debit card is linked to both your sterling and euro accounts. If you are purchasing in sterling or euro you must have funds in the respective account. Purchases in any other currencies (e.g. US Dollars) are converted and applied to your default account (euro for Eurozone residents and sterling for UK residents).
To access the Fire app, you must validate your phone number and email address and complete a validation process. The app uses security technologies to ensure the privacy of data and the authentication of users. If at any time you have concerns over your account, please contact us.
The “flame” section of the app, along with the real time notifications for card transaction, payments and requests will alert you to important activity. These notifications are generally sent in real time to your phone. Should you misplace your card, there is an option within the app to block the card – see the accounts section of the app. In the event that you have misplaced your phone and/or card you can log into your account at https://personal.fire.com/login and disable your mobile phone and/or block your debit card.
Your rights are outlined by the European Commission here.
As a fully registered user, you can download an annual statement of fees incurred on your account in the Fire App. Enter the relevant account and select “Statement of Fees” from the “Options” menu. You can also request a paper copy by contacting support@fire.com
Your default account is based on your country of residence. If you are a resident of Ireland, your default account is your Euro Account. If you are a resident of The United Kingdom, your default account is your Sterling Account.
A Direct Debit mandate is a convenient way to make regular payments from your account, such as insurance payments or a monthly utility bill.
To set up a Direct Debit from your Fire Personal Account, you will need to provide the biller with either the NSC and Account Number of your chosen Sterling account, or the IBAN of your chosen Euro account, and sign a mandate giving them permission to take the funds from your account on an agreed date. The funds will automatically be deducted from your account on the specified date.
You will receive advance notifications from the mobile app reminding you of any Direct Debit payments due from your account, showing you the date and amount to be paid, so you can ensure there are sufficient funds in the account ahead of time. The notifications are enabled as default, but can be disabled in the app settings if you wish.
You can also view the details of any Direct Debit Mandates set up on your account in the Direct Debits section of the app.
If you feel that you should not be paying a Direct Debit, you can cancel the mandate from the Actions menu. It is important that you also make the biller aware so they can resolve the issue.
If you have forgotten both your access code and password, please contact us at support@fire.com to allow us to reset your details.
- Once confirmation has been received from our Operations Team, you will receive an email titled “Forgotten Password for Fire”.
- Tap the ‘Reset Password’ button within the email.
- Enter the SMS Code sent to your phone number.
- Choose your new Password and enter it into the ‘New Password’ fields.
- Once you have submitted this information, a new email titled ‘Password reset, now reset your Access Code’ will be sent to your email address.
- Follow the steps outlined in the email to reset your Access Code. You can see these steps in detail here.
We understand that losing someone close to you is a difficult and sensitive time. Our team is here to assist you with the process of closing the account and releasing the funds.
The steps below give you an idea of what to expect, and the documents we will request from you.
- Contact our support team at support@fire.com to notify us of the death.
- We will ask you to send us an original or certified copy of the Death Certificate so that we can suspend account activity.
- We will also ask you to send us an original or certified copy of the Will or Probate, as well as proof of identity and address from you as the Executor, in order to release the funds to the instructed account.
When adding a new payee, Fire, as your Payment Service Provider (PSP), can check the account name, sort code, and account number match with the records held by the receiving PSP to determine their accuracy.
With a Confirmation of Payee check, there are four possible outcomes:
- Full match: If the details match, you will be able to continue adding the payee without issue.
- Close match: If the name is similar, you’ll be shown the actual account holder’s name to review. You can update and try again or double-check with the recipient.

- No match, the name is wrong: If the name doesn’t match, you’ll be advised to contact the person or organisation you’re trying to pay.

-
Unavailable: This means a check couldn’t be completed, for example due to timeout, customer opt-out, or if the account doesn’t exist.
To pay a personal account, the sender will need the exact name used when you registered your account as well as your sort code and account number when adding you as a payee on their account.